Geometric construction
Geometric construction refers to the process of drawing lines, angles, and other geometric shapes and figures using only a compass and a straightedge (usually a ruler without measurements), without use of specific measurements of length, angle, etc.
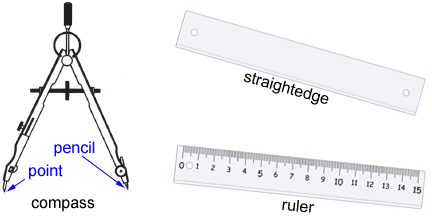
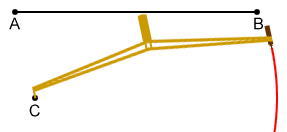
A normal or mechanical compass like the one shown above is used to draw circles and arcs. It can also be used to copy line segments. The straightedge or ruler to the right is used to draw line segments, but not to measure length.
Basic geometric constructions
A compass and straightedge can be used to draw many geometric figures and constructions. Below are a few common examples.
Circles and arcs
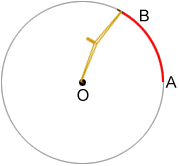
To draw a circle or arc, place the point end of the compass at a point, O, and place the pencil end of the compass at point A. Then, move the pencil end counterclockwise to point B to construct arc AB. To draw a complete circle, continue drawing an arc until the pencil end of the compass makes a full circle back to point A. Line segments OA and OB are radii of the circle.
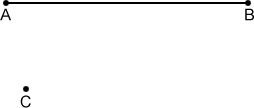
Copying a line segment
Construct a copy of line segment AB:

- Draw point C.
- Place the compass point on A and the pencil end on point B.
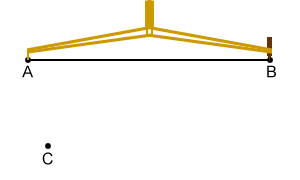
- Without changing the compass width, place the compass point on C and draw an arc.
- Draw point D, the other endpoint of the copied line segment, anywhere on the arc. Draw a line segment from C to D with a straightedge. Line segment CD should have the same length as AB as long as the compass width was maintained.
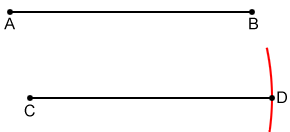
- You can pick any point on the arc constructed in step 3 to copy line segment AB.
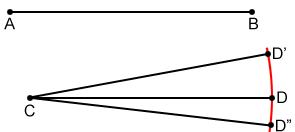 AB≅CD≅CD'≅CD"
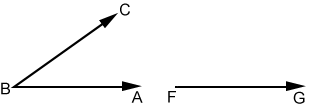
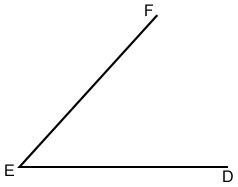
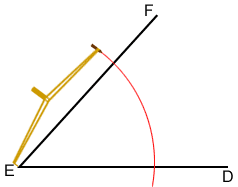
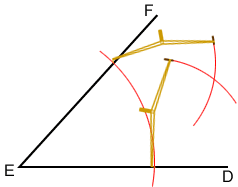
Copying an Angle
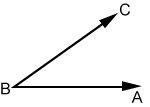
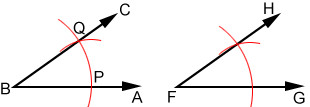
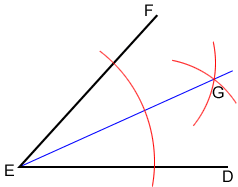
Construct a copy of angle ABC using a compass and straightedge:
- Draw ray FG.
- Place the compass point on B and draw arc DE through rays AB and BC.
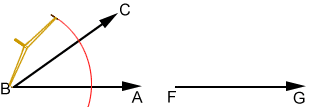
- Maintaining the compass width, place the compass point on F and draw an arc through ray FG.
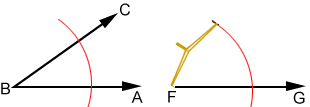
- Label the intersections of arc DE and angle ABC (from step 2) P and Q. Place the compass point on P and draw an arc through Q. The radius of the arc is line segment PQ.
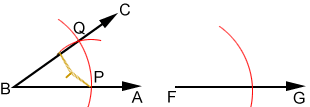
- Again, keeping the compass width the same, place the compass point on the intersection of the arc, drawn in step 3, and ray FG, then draw an arc above ray FG such that it intersects the other arc.
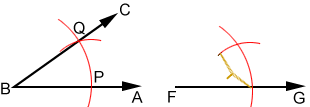
- Draw a ray from F through the intersection of the two arcs. Label the head of the ray H. The measure of angle GFH should be equal to the measure of angle ABC.
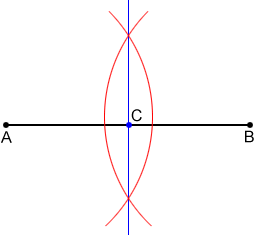
Midpoints and perpendicular bisectors
Construct a midpoint and a perpendicular bisector for line segment AB below:

- Place the compass point on point A and open the compass such that its width is greater than half the length of the line segment. Maintain the width of the compass and draw an arc above and below the line segment. Keep in mind that the arc will need to intersect the arc drawn in the next step, so draw arc that are relatively long.
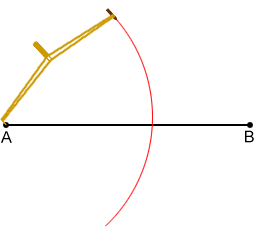
- Maintain the compass width, place the compass point on B, and draw arc above and below the line segment such that they intersect the first arc at two points.
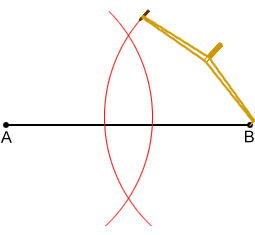
- Draw a line through the intersections of the two arcs. Call the point of intersection of the line and line segment AB point C. Point C is the midpoint and the line is the perpendicular bisector of line segment AB.
Bisecting an angle
Construct an angle bisector:
- Place the compass point on vertex E and draw an arc through both ray ED and EF.
- Place the compass point on the intersection of the arc (drawn in step 1) and ray EF, draw an arc in the interior of angle DEF. Maintain the width of the compass and repeat this process with the compass point instead on the intersection of the arc and ray ED. Make sure the two arcs drawn in this step intersect.
- Label the intersection of the two interior arcs G. Draw a ray from E through G. Ray EG should bisect angle DEF forming congruent angles DEG and FEG.
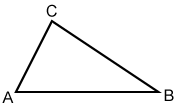
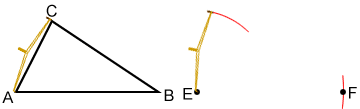
Copying a triangle
We can use some of the basic constructions shown above to copy triangle ABC.
- Measure the length of side AB by placing the compass point on A and the pencil end on point B. Draw a point, E.
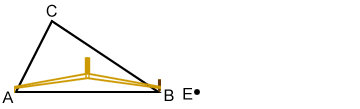
- Maintain the width of the compass, place the compass point on E, and draw an arc to the right of E. Draw a point, F, somewhere on the arc. Line segment EF should be equal in length to AB.
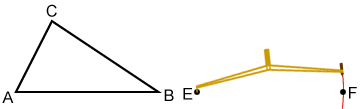
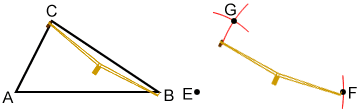
- Measure the length of side AC by placing the compass point on A and the pencil end on point C. Maintain the width of the compass, place the compass point on E, and draw an arc.
- Measure the length of side BC by placing the compass point on B and the pencil end on point C. Maintain the width of the compass, place the compass point on F, and draw an arc such that it intersects the arc drawn in step 3. Label the intersection of the two arcs G. Line segment FG should be equal to line segment BC and line segment EG should be equal to line segment AC.
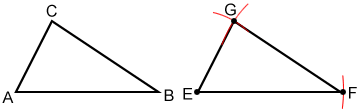
- With a straightedge draw line segments EF, FG, and EG. Triangle EFG should be congruent to triangle ABC
Finding the center of a circle
We can find the center of a circle by constructing the intersection of the perpendicular bisectors of two chords of a circle.
- For the circle given above, draw two chords with a straightedge. Make sure the two chords are not parallel to each other. Label the chords AB and CD.
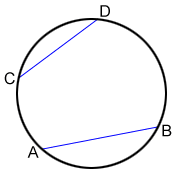
- Construct the perpendicular bisectors of both chords following the steps in the "midpoints and perpendicular bisectors" section above. Label the point of intersection of the two perpendicular bisectors O. Point O is the center of the circle.
